I think the Patchwork style scrap quilt is probably the easiest and most forgiving scrappy block to do. I love making Scrappy Quilts. I love doing this sort of block. It’s somewhat “freeing”. No pattern to follow, no instructions to read, no measurements to make and keep, no precise cutting. Just plain ol sewing. When I feel as if I have no brain power left, but I don’t want to be a couch potato. I sew scraps!
Are ya ready?! {in my best Monday Night Football voice} LOL
K. This is how I do it. It is by no means the only way. And I would love for everyone who has sewn with their scraps, to share in the comments any tips or tricks that work for you, or that you think of as we go along.
Determine how big you want your quilt. My Scrappy 2009 quilt is approx. 48″ x 72″ . I usually Square my blocks up to 8″-9″.
According to my chart a Twin Size Quilt is approx. 68″x88″. I rarely make my scrappy quilts full size. I like them to be wide enough and long enough to curl up under for a nap or watching t.v. And it suits my family and I.
If you want to make a 48″ x 72″ quilt. You’ll need 54 – 8 1/2″ blocks. (6 blocks across, 9 blocks down).

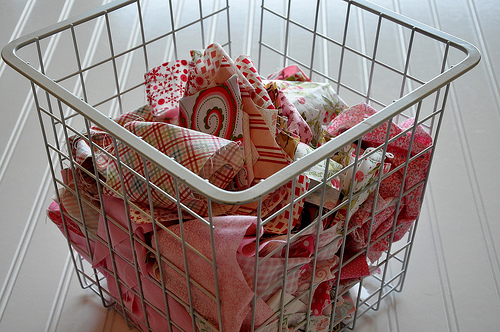
If you haven’t already. Take a look at your scraps. Decide what colors you’ll be using in your quilt. Then grab one of your scrap boxes, bins, bags, or piles, and start digging through em.
Pink Scraps Basket
You want to start with a small piece, a square or rectangle, it doesn’t matter. This will be the center of your block. Most of my center’s start off at about 1 1/2″ -3″. Dig through your scraps and pick out 54 smaller pieces. You can do 10 blue, 10 green, 10 yellow, etc. Or make all your centers the same color. There are no rules.
Getting Ready
Now you’ll need to pick out 54 more scraps. Either the same size or just a bit bigger. You’ll want these to be different colors then your center piece. I take all the pieces and just run a hot iron over them to get the big wrinkles out.
Here we go! This is when we put the pedal to the metal.
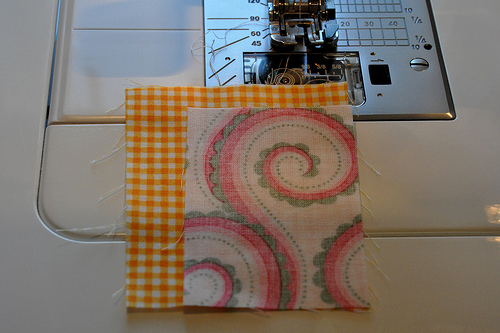
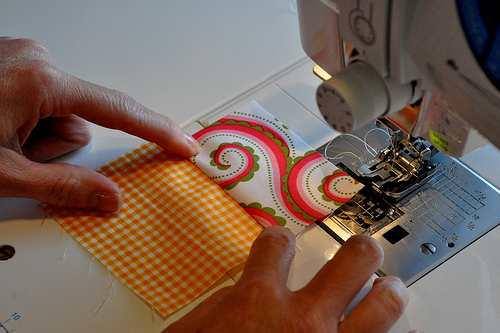
Star sewing the two scraps together. I don’t trim the crazy fraying threads off, but if you must, you can. {No one is going to see the back of the top of your quilt but you.}
See Also: How a Buyers Agent in Sydney Can Secure Your Ideal Property
Sew
Now all 54 of your center pieces are sewn to 54 other scraps. I finger press to start with, it’s quick and works just great. But if you have to, you can iron. Remember, there’s no rules. You do what feels best to you. We don’t want to be stressed when we’re sewing scraps.
Finger Press
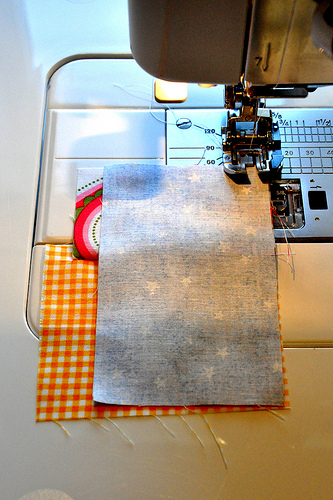
Now I grab a scrap bin and start grabbing scraps that are as long or longer then the two pieces I just sewed together. Go to the next scrap bin and grab some more, etc. And sew away!
Sew
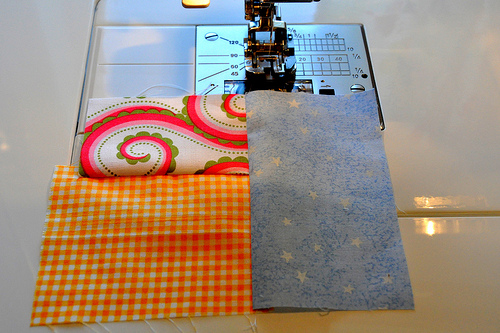
Finger Press again. Notice I have done no trimming, and there are 3 pieces sewn together.
Sew
Time to dig through your scraps again. I take the three pieces of fabric I’ve sewn together and lay them on my cutting table. I grab a scrap I think is the right length, lay it next to the sewn piece and if it’s long enough, I lay it on top of the 3 piece block, grab the next block, find a scrap, lay on top, and start making a pile to take over to my sewing machine to stitch away. Here goes the fourth piece.
Sewing
Finger press again. I don’t have a straight edge to sew the next scrap too. So I’ll take this block over to the ironing board, give it a quick press and then to the cutting mat and start squaring up the blocks a bit.
Press
No matter what size, just trim them up so they have straight edges on all four sides of the block.
Trim
Now I start diggin into the long strips in my scrap bins. No ironing, just chain stitching the blocks onto the strips. Depending on how long your strips are, will depend on how many blocks can be sewn to one strip. Grab another strip in a different color and sew more blocks onto that strip. And just keep going until you’ve done all 54 blocks.
Sewing
I keep my scissors handy and when all 54 blocks have been sewn onto strips, I just cut in between the blocks. I’ll trim them up later. NOTE: If you don’t have strips, that’s O.K. just continue to pick scraps that are long enough to sew up one side of a block.
Cutting
I’ll take the pile over to the ironing board and quickly press the blocks and trim the ends.
See Also: Your Guide to Navigating Sydney’s Competitive Real Estate with a Buyers Agent
Almost a block
Here are two starts of a 8.5″ block. One is more square then the other. No worries. The block above, you can continue to sew around and continue to keep it in a square. The block below you will want to add to the longest side next, in order to start making it into a square.
Getting there
I have a ruler on the table of my Queen (Queen Elna that is) so when I get close to 8 1/2″, I’ll lay the block down on the ruler to see where I need to add my next scrap piece and how wide it should be.
Oh and I forgot. Did you know your scraps can have babies! As you continue to sew around the block and trim, you’ll end up with more scraps! LOL I put this size in the keep pile to later throw into my scrap bins.
Keep Pile
This little tiny itsy bitsy stuff you can throw away. (or use it to pack goodies in when shipping!)
Throw Away Pile
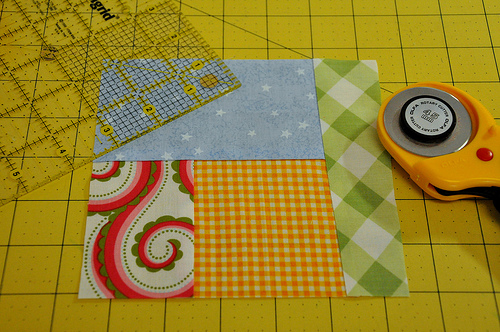
I continue to sew around and now I have enough of a block to trim into a 8.5″ square. I use one of my Square It Up! templates and wah lah! I’ve decided to make these blocks into a Baby Quilt, so I’m trimming them to 8″ Squares.
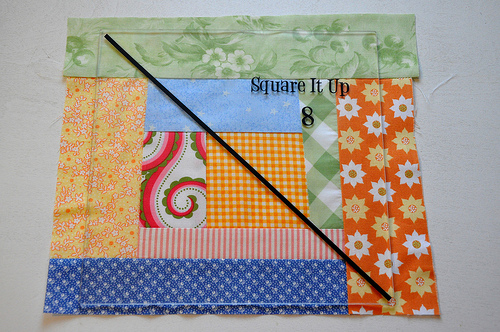
Square it up
Here are the first two blocks squared up to a 8″ square for my baby quilt. Don’t ya love em! I’ve chosen to use all blues, oranges, yellows, greens and pinks, only.
Scrappy Blocks
Here are the first two blocks sewn together. Love em!
2 Scrappy Blocks
And here is the start of a row for the baby quilt. I’ll make the baby quilt probably 5 rows across and 7 or 8 rows down.
4 Scrappy Blocks
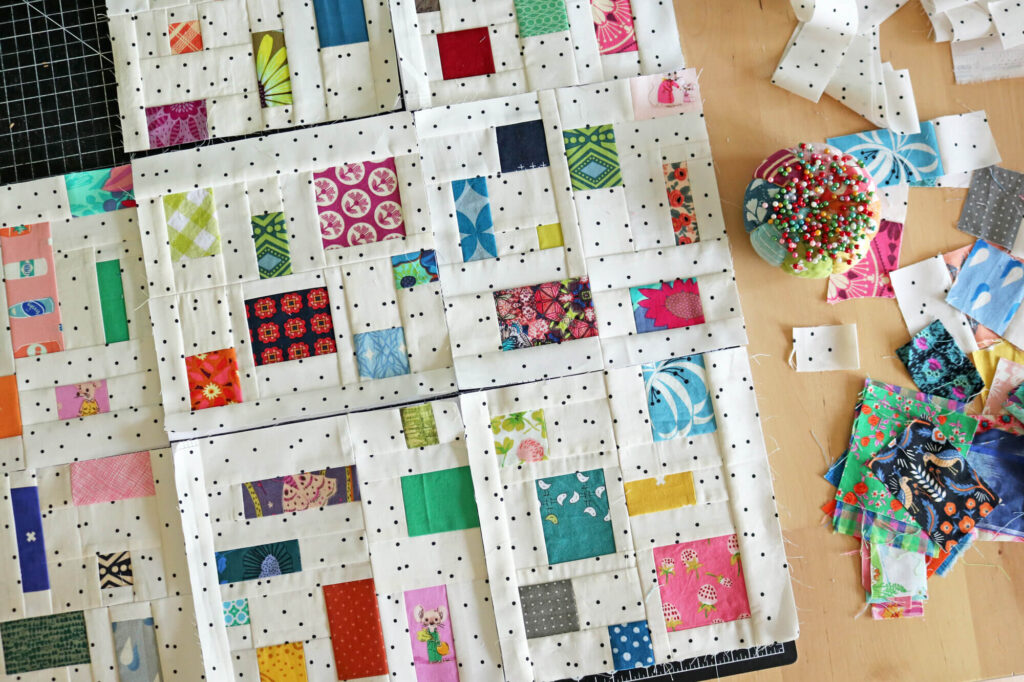
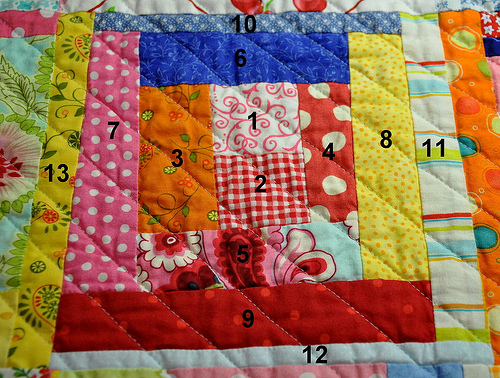
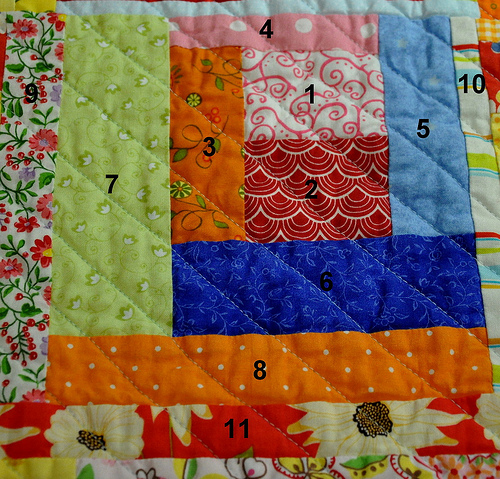
Here are a few of the blocks from my Scrappy 2009 quilt. I’ve numbered the scraps/pieces in the order I have sewn them. So hopefully you can get a general idea how I assemble the blocks.
How to Piece a Scrappy Quilt
Each one is a little different. There really is no rhyme or reason how I piece the block together. That’s what is so great about it! Just sew! Try and keep it in a square, but use your scraps! If your block starts off as a rectangle, then keep sewing scraps to the longer sides, until it starts to form a square.
How to Piece a Scrappy Quilt 2
You can see that some scraps or wider then others, some are super skinny. And I try not to put two colors together side by side or around the corner from each other. But sometimes it happens and it’s totally cool! See piece No. 6 and No. 10. Both blue. No biggy…
How to Piece a Scrappy Quilt 3
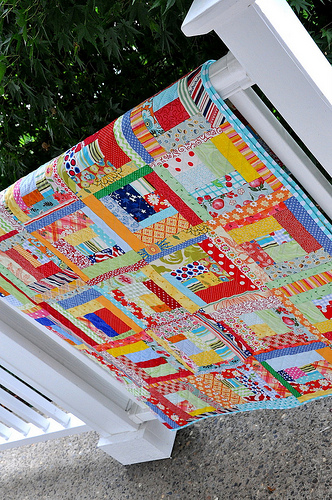
Here is the quilt top before quilting. If you look close, you will see that rarely are two blocks pieced together the same way. And they’re not totally square either.
Scrappy 2009 Quilt Pre-quilting
This quilt uses all sizes of scraps. Wide. Thin. Short. Long. You can even sew a scrap that has a crooked edge, because you can trim it up after it’s sewn on. Sew, press, trim.
NO MEASURING. It’s so fun!
Although I mentioned in an earlier post that this is not my most favorite Scrappy Quilt. I also love it for many reasons;
It’s old fashioned to me. It reminds me of a Grandma’s scrap quilt. Each scrap holds some sort of memory for me. I can’t look at a block and a certain piece and not think of the project that I made with it.
I imagine someday my grandkids snuggled up in their favorite scrappy quilt, or playing with matchbox cars on them, using the pieces and the quilting as roads. ;o) Or playing I spy as they fall asleep. And most of all. I don’t’ worry about these quilts. They are scrappy and intended to be used!
And used well! Loved, washed often, soft and worn. And it’s O.K.! They’re scraps! I take them out to the back yard and throw em on the grass, lay back and read a good book. I throw em in the car on trips to snuggle up in when the temperatures dip. Yep. I’m hooked on Scrap Quilts!